That tiny chip in your tile has a way of catching your eye every single time you walk past it. If you are wondering how to fix chipped tile, the good news is that many small chips can be repaired without ripping up the whole floor or calling in a contractor.
The trick is knowing when a chip is cosmetic and when it is a warning sign. A small nick on the glaze can usually be filled, tinted, and sealed. A deep break, spreading crack, loose tile, or hollow sound may point to a bigger issue underneath.
Tile is durable, but it is not invincible. Dropped pans, heavy tools, chair legs, moving appliances, poor installation, subfloor movement, and sharp impact can all leave chips, cracks, or broken corners. In some cases, repairing the surface is enough. In others, replacing the tile is the smarter long-term move.
Safety matters too. Cutting, grinding, or removing tile can create dust, and OSHA warns that respirable crystalline silica exposure is linked to serious diseases including silicosis, lung cancer, COPD, and kidney disease. If your repair involves drilling, grinding, or demolition, use proper dust control and protection, and consider hiring a professional for larger work.
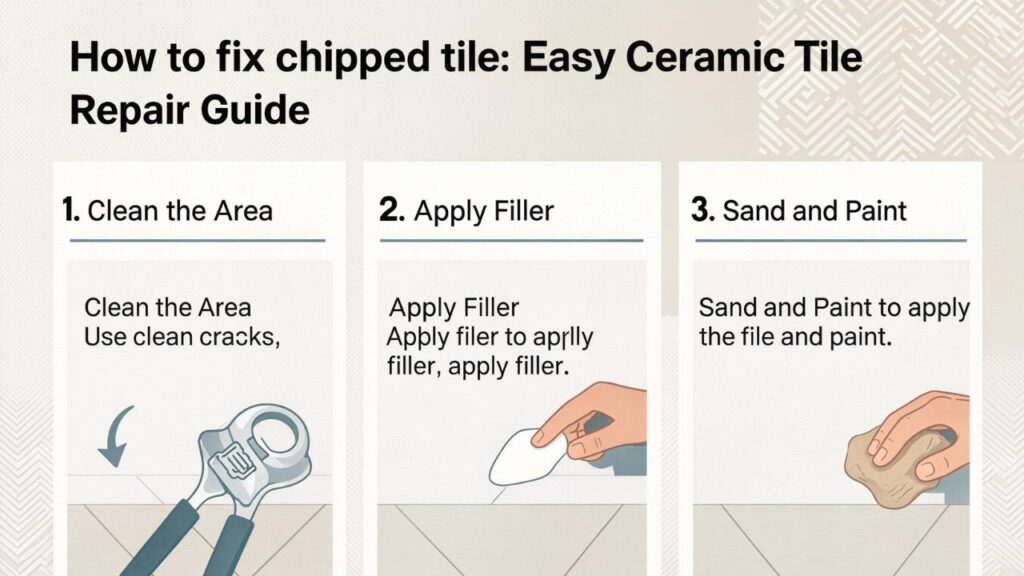
Table of Contents
- What Chipped Tile Repair Really Means
- Why Tiles Chip in the First Place
- When Repair Is Enough and When Replacement Is Better
- Tools and Materials You May Need
- how to fix chipped tile Step by Step
- How to Repair Different Tile Types
- How to Replace a Badly Chipped Tile
- Grout, Caulk, and Edge Repairs
- Cost, Value, and Professional Insights
- Common Mistakes to Avoid
- Real-Life Repair Examples
- FAQ
- Conclusion
What Chipped Tile Repair Really Means
Chipped tile repair means filling, coloring, smoothing, or replacing damaged tile so the surface looks better and performs safely. The right repair depends on the tile material, chip depth, location, finish, and whether the damage is only on the surface or part of a larger failure.
A small chip on a glossy ceramic tile is often a cosmetic problem. You can clean it, fill it with epoxy or tile repair filler, color-match it, and seal or topcoat it. The repair may not become completely invisible, but it can stop the chip from shouting at you every time sunlight hits the floor.
A cracked or loose tile is different. If the tile moves, sounds hollow, or has a long fracture, the problem may involve poor bonding, substrate movement, impact damage, or lack of proper support. In that case, learning how to fix chipped tile may lead you to a replacement rather than a surface patch.
The International Masonry Institute notes that ceramic tiles that are severely cracked, spalled, or otherwise damaged are commonly replaced rather than repaired in place, and that replacement tile should match the existing tile aesthetically and have compatible material properties.
In everyday terms, repair is great for small damage. Replacement is better when the tile is structurally compromised.
Why Tiles Chip in the First Place
Tiles usually chip because something concentrates force on a small area. A dropped cast-iron pan, metal tool, glass bottle, ladder foot, or furniture leg can break the glaze or knock out a small piece of tile.
However, impact is not the only cause. A tile can chip more easily if it was poorly installed. If there are voids under the tile, the surface may not be fully supported. When weight lands on an unsupported spot, the tile can crack or chip. This is common around corners, edges, and high-traffic paths.
Subfloor movement can also create damage. If the surface underneath the tile flexes, shifts, expands, or contracts, the tile may crack. Tile is strong under compression, but it does not like movement. That is why a repair that ignores the cause can fail again.
Moisture can play a role too, especially in bathrooms, showers, entryways, laundry rooms, and kitchens. Water may not cause every chip directly, but moisture problems can weaken the surrounding installation, grout, or substrate.
Common causes include:
- Dropping heavy objects
- Dragging furniture or appliances
- Using metal chair legs without pads
- Poor mortar coverage under the tile
- Uneven subfloor or wall surface
- Movement in the substrate
- Freeze-thaw stress in outdoor tile
- Old or brittle grout
- Improper edge finishing
- Low-quality or mismatched replacement tile
The more you understand the cause, the better your repair will be. A chip from one dropped mug is simple. Repeated chips along a doorway may signal an installation or transition problem.
When Repair Is Enough and When Replacement Is Better
Before choosing a filler, look closely at the tile. This small inspection can save you from doing a pretty repair over a deeper issue.
Repair is usually enough when the chip is small, shallow, stable, and limited to the surface. If the tile is firmly bonded, the surrounding grout is intact, and there is no spreading crack, a DIY patch can work nicely.
Replacement is usually better when the tile is cracked through, loose, badly broken, deeply gouged, missing a large corner, or damaged in a wet area where water can reach behind the surface. A tile that moves underfoot should not simply be filled.
Here is a simple comparison:
| Tile condition | Best option | Why it matters |
|---|---|---|
| Tiny glaze chip | Fill and color-match | Mostly cosmetic |
| Small corner nick | Epoxy filler or repair kit | Prevents rough edge and visual distraction |
| Deep chip exposing body | Fill carefully or replace | Depends on location and appearance |
| Long crack across tile | Usually replace | May indicate structural damage |
| Loose or hollow tile | Replace and inspect substrate | Surface filler will not solve movement |
| Shower tile chip | Repair only if waterproofing is intact | Wet areas need extra caution |
| Historic or rare tile | Consider specialist repair | Matching may be difficult |
| Multiple chips in same area | Investigate cause | Repeated damage suggests a pattern |
| If you have spare tiles from the original installation, keep them. A matching tile can make replacement much easier. If not, check closets, attic boxes, garage shelves, old receipts, manufacturer markings, or local tile shops. |
Tools and Materials You May Need
The exact materials depend on the repair method, but most small chips can be handled with basic supplies. Do not rush this part. A clean, color-matched repair looks better because the prep was careful.
For small chip repair, you may need:
- Mild cleaner or rubbing alcohol
- Soft cloths
- Painter’s tape
- Small artist brush
- Two-part epoxy, ceramic filler, or porcelain repair compound
- Putty knife, toothpick, or plastic scraper
- Fine-grit sandpaper or polishing pad
- Color-matching paint or tint
- Clear topcoat or sealant if recommended by the product
- Disposable gloves
- Safety glasses
- Good lighting
For replacement, you may need: - Matching tile
- Grout removal tool
- Painter’s tool or putty knife
- Hammer and chisel
- Thinset mortar or tile adhesive suitable for the area
- Notched trowel
- Tile spacers
- Grout
- Sponge and bucket
- Caulk where movement joints are required
- Dust control supplies
- Eye and hand protection
A small repair kit is often enough for a surface chip. A full replacement requires more patience and more risk, especially because surrounding tiles can be damaged during removal.
how to fix chipped tile Step by Step
The easiest way to learn how to fix chipped tile is to slow the process down. Most poor repairs fail because the surface was dirty, the filler was rushed, the color match was ignored, or the patch was sanded too aggressively.
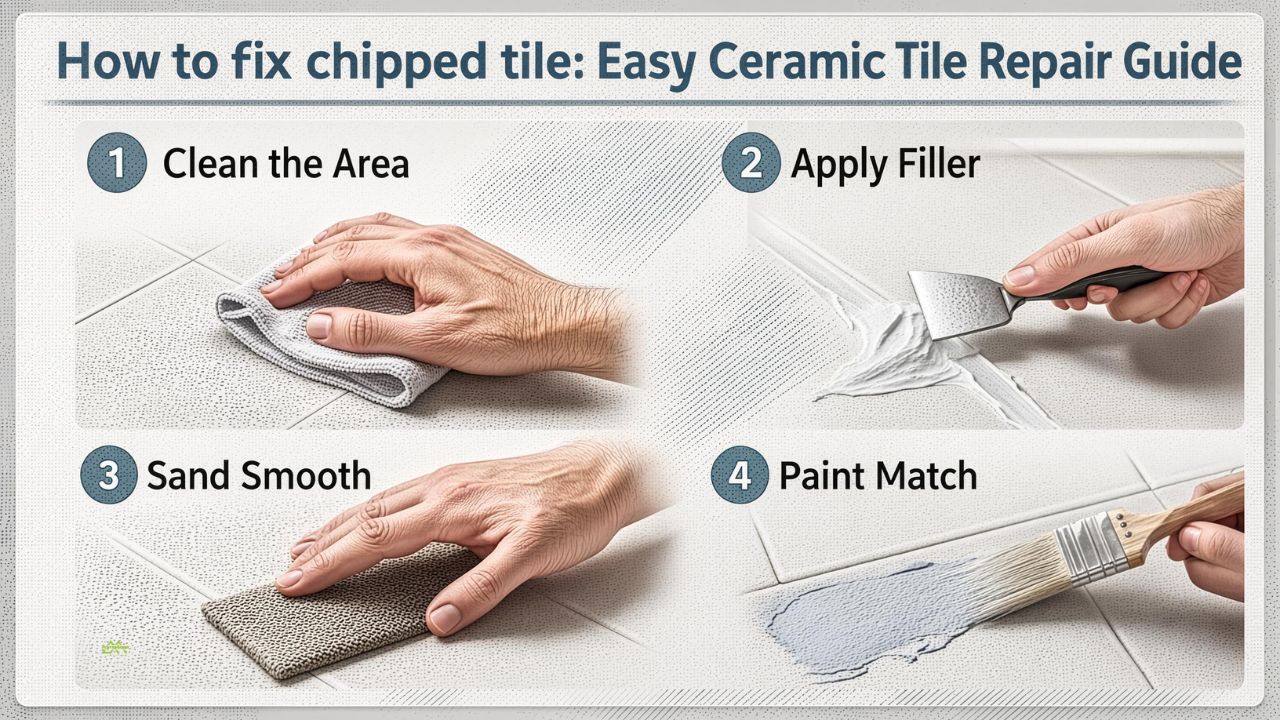
Step 1: Clean the damaged area
Clean the chip with mild soap and water, then dry it completely. If there is grease, wax, soap scum, or cleaner residue, use rubbing alcohol on a cloth and let the area dry again.
This step sounds too simple to matter, but filler needs a clean surface. Dust or oil can prevent good bonding.
Step 2: Inspect the chip
Look at the depth, edges, and location. Press gently around the tile. If the tile moves, stop and consider replacement. If the tile is firm and the chip is small, continue.
Check the grout too. If nearby grout is cracked or missing, repair may need to include grout work. TCNA says grout joints cannot simply be “grouted over” successfully; at least two-thirds of the old grout depth should be removed when replacing or repairing grout.
Step 3: Tape around the chip
Use painter’s tape around the damaged area so filler does not smear across the tile face. Leave the chip exposed. This makes cleanup easier and keeps the patch controlled.
Step 4: Mix or prepare the filler
Follow the repair product instructions exactly. Two-part epoxies usually have a limited working time after mixing. Ceramic and porcelain repair compounds may have different curing and sanding rules.
Do not mix too much. A tiny chip needs a tiny amount.
Step 5: Fill the chip
Use a toothpick, small putty knife, or artist tool to place filler into the chip. Slightly overfill if the product shrinks or needs sanding, but avoid making a big mound.
Try to keep the repair inside the missing area. The cleaner the application, the less sanding and touching up you will need later.
Step 6: Smooth the surface
Level the filler while it is workable. Some products can be smoothed with a damp tool; others should be shaped after curing. Follow the instructions on the package.
For glossy tile, the surface should be as smooth as possible. A raised blob will catch light and look worse than the chip.
Step 7: Let it cure
Give the filler enough time to harden. Do not walk on it, clean it, or paint it too early. Rushing cure time can cause dents, smears, or weak bonding.
Step 8: Sand or polish gently
If the product allows sanding, use very fine grit and a light touch. Protect the surrounding tile glaze. Sand only enough to level the repair.
Step 9: Color-match the repair
If the filler does not already match, use ceramic touch-up paint, enamel paint, pigment, or a manufacturer-approved color product. Small artist brushes work better than large brushes.
Color matching is the most human part of the job. Real tile often has speckles, veining, texture, or slight variation. You may need to layer colors instead of using one flat shade.
Step 10: Seal or topcoat if needed
Some repair products include a gloss coat or clear finish. Use it only if recommended. A glossy tile usually needs a shiny topcoat; a matte tile may look better without too much shine.
How to Repair Different Tile Types
Not all tiles behave the same way. A repair that looks good on ceramic may stand out badly on natural stone. Before applying anything, understand what kind of tile you have.
Ceramic tile
Ceramic tile often has a glazed surface over a different-colored body. When it chips, the exposed body may look tan, red, white, or gray. That color contrast is why ceramic chips can be so visible.
Small ceramic chips are good candidates for epoxy filler and touch-up paint. Glossy ceramic usually needs careful topcoating so the sheen matches.
Porcelain tile
Porcelain is dense and often more chip-resistant than standard ceramic, but it can still chip. Some porcelain tiles are through-body or color-body, meaning the color continues deeper into the tile. Chips may be less obvious.
Porcelain repair can still use epoxy or porcelain repair compound. The challenge is often texture. Many porcelain tiles imitate wood, stone, or concrete, so the repair may need subtle color layering.
Natural stone tile
Stone is different. Marble, travertine, slate, limestone, and granite may need stone-specific filler, epoxy, polishing, or professional restoration. Acidic cleaners can damage some stones, especially marble and limestone.
For stone, avoid random paint-based fixes unless the damage is tiny and hidden. A stone restoration specialist may be the better choice for visible floors, showers, and countertops.
Glass tile
Glass tile chips can be tricky because transparency, shine, and reflection are hard to fake. Small edge chips may be softened or filled, but face chips often remain visible. Replacement may look better if the tile is prominent.
Textured tile
Textured tile hides some damage better but is harder to patch smoothly. A flat repair on a textured surface may look like a shiny spot. Try to mimic the surface gently while the filler is workable.
How to Fix Chipped Tile in Wet Areas
Bathroom floors, showers, tub surrounds, backsplashes, laundry rooms, and entryways need extra thought because moisture changes the stakes.
A small chip on a bathroom floor may be cosmetic. A chip inside a shower niche, shower floor, or wet wall can be more serious if it allows water to reach the installation beneath. Tile and grout are not the same as a waterproofing system. If water is already getting behind the tile, a surface patch will not solve the real problem.
If the chip is in a shower and the tile is loose, cracked, or surrounded by failing grout, do not simply cover it with filler. Inspect the surrounding area. Look for dark grout, soft spots, swelling, musty smell, or repeated cracking.
TCNA’s grout guidance also warns that using grout where caulk is more appropriate can create structural and aesthetic problems, including cracking and moisture penetration at movement areas.
For wet areas:
- Use repair products rated for wet locations.
- Allow full cure time before exposing to water.
- Repair nearby grout or caulk correctly.
- Do not ignore loose tile.
- Avoid sealing moisture inside an already failing area.
- Hire a tile professional if damage is near a shower pan, curb, niche, or corner.
How to Replace a Badly Chipped Tile
Sometimes the honest answer to how to fix chipped tile is replacement. It sounds intimidating, but replacing one tile is manageable when you work carefully and have a matching tile.
Step 1: Remove grout around the tile
Use a grout removal tool to clear grout around the damaged tile. Work slowly so you do not chip neighboring tiles. Removing grout first helps isolate the damaged tile.
TCNA’s advice that old grout must be removed to a proper depth before repair supports the same idea: surface-level shortcuts rarely hold well.
Step 2: Break or loosen the damaged tile
Wear eye protection and gloves. Gently break the damaged tile from the center outward using controlled taps. Do not pry against surrounding tile edges.
If the tile is already loose, you may be able to lift pieces more easily. If it is firmly bonded, patience matters.
Step 3: Clean the substrate
Remove old mortar, adhesive, and debris. The surface should be flat enough for the new tile to sit level with neighboring tiles.
Be careful not to damage waterproofing membranes in wet areas. If waterproofing is damaged, the repair becomes more serious.
Step 4: Test-fit the replacement tile
Dry-fit the tile with spacers. Check height, alignment, and grout joint width. If the new tile is thicker or thinner than the old one, it may not sit flush.
Step 5: Apply mortar or adhesive
Use the correct setting material for the tile and location. A dry floor area is different from a shower. Follow manufacturer instructions for open time, trowel size, and cure time.
Step 6: Set the tile
Press the tile into place and align it with surrounding grout lines. Clean squeeze-out before it hardens. Let the tile set undisturbed.
Step 7: Grout the joint
After the tile is set, grout the joints with matching grout. Clean haze carefully. Let the grout cure as directed.
Step 8: Caulk movement joints if needed
Do not grout corners, changes of plane, or movement joints if flexible sealant is required. Use color-matched silicone or appropriate sealant for wet areas when needed.
Grout, Caulk, and Edge Repairs
A chipped tile often comes with damaged grout or exposed edges. Ignoring those details can make the repair look unfinished.
Grout fills the joints between tiles. It is not meant to absorb movement the way flexible sealant can. TCNA explains that grout used instead of caulk can crack and allow moisture to penetrate, especially where movement occurs.
Use grout for stable joints between tiles. Use appropriate caulk or sealant at changes of plane, corners, tub-to-tile transitions, countertop-to-backsplash joints, and other movement areas.
Edge chips are common on tile steps, thresholds, countertops, shower niches, and exposed corners. If the edge is sharp, smooth it carefully or use a repair product designed for exposed areas. For repeated edge damage, consider a trim profile, transition strip, bullnose tile, or metal edge guard.
A repair should not only hide the chip. It should also make the area safe to touch and walk on.
Cost, Value, and Professional Insights
There is no personal background or net worth angle for this topic because it is a home repair task, not a public person. The useful financial question is whether repairing, replacing, or hiring a professional makes the most sense.
A small DIY chip repair can be inexpensive. A repair kit, touch-up paint, and basic supplies may cost far less than calling a contractor. If the chip is small and the tile is in a low-visibility area, DIY is often practical.
Replacing one tile costs more in time and risk. If you already have a matching tile and the area is dry, the project may still be affordable. If the tile is in a shower, on a heated floor, over waterproofing, or part of an expensive pattern, professional help may be worth it.
The Ceramic Tile Education Foundation offers guidance on hiring qualified tile installers and notes that qualified contractors understand high-quality installation practices and common tile installation problems. For larger failures, repeated cracking, or wet-area repairs, installer skill matters.
Cost depends on:
- Size and location of the chip
- Tile material
- Whether color matching is needed
- Whether the tile must be replaced
- Availability of matching tile
- Grout and caulk condition
- Subfloor or substrate issues
- Shower waterproofing concerns
- Labor rates in your area
A cosmetic patch is cheap. Fixing the reason tiles keep cracking can cost more, but it protects the floor or wall from repeated failure.
Safety Notes Before Cutting or Removing Tile
Small filler repairs are low-risk when you follow product instructions. Removal, grinding, cutting, and demolition are different. Tile, mortar, grout, backer board, concrete, and stone products may produce hazardous dust when disturbed.
OSHA warns that respirable crystalline silica particles can be created during work with stone, rock, concrete, brick, block, mortar, and similar materials, and that inhaling these particles increases the risk of serious diseases.
Lead is another concern in older homes. The EPA says renovation, repair, and painting work in pre-1978 homes or buildings with lead-based paint can create dangerous lead dust, and its Renovation, Repair and Painting program addresses lead-safe work practices.
For DIY tile removal:
- Wear eye protection and gloves.
- Control dust with appropriate methods.
- Avoid dry grinding when safer methods are available.
- Keep children and pets away.
- Use a proper respirator when dust risk exists.
- Be cautious in homes built before 1978.
- Hire a certified or qualified pro for larger or uncertain work.
A tiny chip repair is one thing. Demolishing a bathroom floor is another.
Common Mistakes to Avoid
The first mistake is filling a loose tile. If the tile moves, filler will not fix the real problem.
The second mistake is skipping cleaning. Filler applied over grease, dust, or soap residue may peel or pop out.
The third mistake is using the wrong product. Wood filler, wall spackle, nail polish, or random craft paint may look okay for a week and then fail.
The fourth mistake is ignoring color and sheen. A perfect color with the wrong gloss still looks obvious. A glossy patch on matte tile can stand out badly.
The fifth mistake is sanding too much. You can scratch the surrounding glaze and turn a small chip into a larger visual problem.
The sixth mistake is grouting over old grout. TCNA specifically says joints cannot successfully be grouted over and that old grout should be removed to sufficient depth during repair.
The seventh mistake is repairing wet-area damage without checking for moisture problems. In showers, a chip can be the visible part of a bigger failure.
The eighth mistake is throwing away spare tiles. Keep extras from every tile project. Future-you will be grateful.
The ninth mistake is expecting invisibility. Some repairs become nearly invisible. Others become “much less noticeable.” That can still be a win.
Real-Life Repair Examples
Picture a kitchen floor where a coffee mug slipped and left a tiny white chip in a gray porcelain tile. The tile is firm, the grout is good, and the chip is smaller than a pea. A careful epoxy fill with gray tint and a matte topcoat may make the damage almost disappear.
Now imagine a bathroom floor tile with a chipped corner near the doorway. People step there every day, and the exposed edge feels sharp. A filler repair may work temporarily, but a transition strip or tile replacement may be better if the edge keeps taking impact.
A shower wall is more delicate. If a shampoo bottle chipped a single glazed tile and everything around it is solid, a wet-area-rated repair product may be enough. However, if grout is cracking nearby or the tile sounds hollow, replacement and inspection are smarter.
A historic fireplace tile is another situation. Matching may be difficult, and the surface may have aged color variation. Instead of replacing it with a modern mismatch, a restoration-minded repair may preserve the character better.
A rental property repair is usually about durability and speed. A landlord may patch a small chip to prevent further damage, then plan full replacement later if multiple tiles are failing.
These examples show why one method does not fit every tile. The best repair is the one that matches the damage, location, and future use.
FAQ
Can I learn how to fix chipped tile without replacing it?
Yes. If the chip is small, shallow, and the tile is firmly attached, you can often repair it with epoxy, ceramic filler, porcelain repair compound, and careful color matching. Replacement is better for loose, cracked, or badly broken tile.
What is the best filler for chipped tile?
Two-part epoxy, porcelain repair compound, ceramic repair filler, or stone-specific filler can work depending on the tile type. Choose a product rated for the surface and location, especially in bathrooms or wet areas.
Can I use nail polish to repair chipped tile?
Nail polish may hide a tiny chip temporarily, but it is not usually the most durable repair. A proper tile repair product is better for floors, showers, kitchens, and high-use areas.
Will a chipped tile repair be invisible?
Sometimes it can be very subtle, but not always invisible. Color, pattern, texture, lighting, and tile sheen all affect the final result. The goal is often to make the chip far less noticeable and prevent rough edges.
Should I replace a cracked tile instead of repairing it?
Usually, yes. A long crack, loose tile, hollow sound, or structural break often needs replacement. Surface repair may hide the symptom but not the cause.
Is a chipped tile in a shower serious?
It can be. A small surface chip may be repairable, but loose tile, cracked grout, or damaged waterproofing can lead to moisture problems. Wet-area damage deserves careful inspection.
How do I match the color of tile filler?
Use a repair kit with pigments, ceramic touch-up paint, enamel paint, or layered colors applied with a small artist brush. Test colors on a hidden area or scrap tile if possible.
Can I replace one tile myself?
Yes, if you have a matching tile and the area is straightforward. Work slowly, remove grout first, protect surrounding tiles, and use the right adhesive and grout. For showers, heated floors, or valuable tile, hire a professional.
Why do my tiles keep chipping?
Repeated chips may come from impact, poor installation, unsupported tile, subfloor movement, sharp transitions, furniture damage, or heavy traffic. If chips keep appearing in the same area, investigate the cause before patching again.
Conclusion
A chipped tile can be annoying, but it does not always mean disaster. Many small chips can be cleaned, filled, color-matched, and softened enough that the room feels cared for again.
The real skill in how to fix chipped tile is knowing the difference between a surface flaw and a deeper problem. Fill small stable chips. Replace loose, cracked, or badly damaged tiles. Treat wet areas with extra caution. And when dust, demolition, waterproofing, or repeated failures are involved, bring in someone qualified.
A patient repair may take only a little time, but it can save the look of a floor, wall, shower, backsplash, or countertop. Start small, work cleanly, and let the repair cure properly. That tiny chip does not have to keep stealing your attention.