
There’s a specific kind of frustration that hits when you’re staring at a rental wall painted “landlord beige” for the fourth year in a row. You want pattern. You want texture. You want something that doesn’t scream “temporary holding cell for humans.” But traditional wallpaper is a commitment that feels permanent and mildly terrifying, especially when your security deposit hangs in the balance. That’s how I stumbled into the world of fabric wallpaper about eight years ago, and honestly, it rewired how I think about interior design.
I was standing in a fabric store, running my fingers across a bolt of heavy cotton damask that cost twelve dollars a yard, when it clicked. This was more interesting than any sheet wallpaper I’d seen at the hardware store, and the math worked out to about a third of the price. Since then, I’ve covered accent walls, closet interiors, rental bathroom ceilings, and yes, even a hollow-core door, all using fabric as wallpaper. There were disasters along the way. A floral print that stretched so badly the roses looked like crime scene blood spatter. A silk blend that stained when the starch hit it. A wall where the fabric peeled off in one giant sheet while I was at work, scaring my cat into a permanent state of distrust. Let’s map out exactly how you can pull this off without reliving my greatest hits of failure.
Why Fabric Beats Paper Every Time
The standard roll of traditional wallpaper has no forgiveness. You misalign a seam by an eighth of an inch, and suddenly your accent wall looks like a puzzle assembled by a distracted toddler. Fabric wallpaper is different. The material has give. It stretches slightly when wet, shrinks taut when dry, and can be repositioned dozens of times before committing. For renters, the real magic sits in the removal. When you use fabric as wallpaper with a starch-based adhesive, removing it involves nothing more than peeling a corner and pulling. The fabric comes off in a single, satisfying sheet, leaving behind zero residue. I’ve tested this in four different apartments. Each time, the landlord walked through, looked at the walls, and handed me my full deposit back without a single question.
Beyond the practical benefits, the aesthetic range of wallpaper fabric crushes what’s available in traditional rolls. Walk into any Joann Fabrics, Mood, or even a thrift store selling vintage curtains. You suddenly have access to heavyweight Belgian linen, Indian block prints, raw silk, mudcloth patterns, and embroidered cottons. The texture of fabric wallpaper reads completely differently than printed vinyl. Light hits the woven fibers and scatters in a way that feels organic and expensive. Guests touch the wall. That’s the tell. No one ever touches painted drywall or vinyl paper, but people instinctively reach out to brush their fingers against a woven fabric wallpaper surface.
The Liquid Starch Method: A Renter’s Best Friend
I need to address a bias upfront. There are multiple ways to hang covering walls with fabric, including heavy-duty paste, upholstery stapling, and even peel-and-stick conversion. But for 90% of people reading this, the liquid starch method is the correct answer. It’s cheap, nontoxic, and completely reversible. If you’re searching for liquid starch fabric wallpaper techniques, you’ve probably seen the old-school Sta-Flo method floating around Pinterest. It works, but the details matter.
Liquid starch is essentially a corn-based stiffening agent used for laundry. When applied to fabric and pressed against a painted wall, the starch soaks through the fibers, dries, and forms a crystalline bond that holds the material tight. When you want to remove it, water dissolves those crystals instantly. No steamers, no scoring tools, no chemical strippers. Just a spray bottle of warm water and patience.
I did a fabric wallpaper diy project in my daughter’s bedroom two years ago using a Chinoiserie-inspired cotton print in pale mint and coral. The wall was approximately 11 feet wide by 9 feet tall. Total material cost came to $47. The fabric has survived a toddler drawing on it with washable marker (wiped clean with a damp cloth), a summer of humidity that would have bubbled traditional paper, and a direct hit from a flying sippy cup of grape juice. The grape juice did leave a faint shadow, so I cut out that 4-inch square, starched a fresh patch in its place, and the repair is invisible. Try doing a seamless patch on regular sheet wallpaper without wanting to throw yourself out a window.
Material Selection: What Actually Works
Not every bolt of cloth translates into successful fabric for wallpaper. I’ve kept a running list of failures. Avoid anything with a high spandex or elastane content. The starch can’t hold the stretch, and your wall will eventually sag like a tired balloon. Avoid heavy woolens; they absorb so much starch that they become a mildew risk in humid climates. Avoid true silks unless you’re willing to deal with water spotting and a finicky temperament that rivals a Victorian ghost.
The sweet spot sits with medium-weight cottons. Quilting cotton works beautifully for small accent walls. Home decor weight cotton, often labeled as upholstery fabric, is the gold standard for fabric wallpaper applications because it’s thick enough to hide paint color beneath and stiff enough to hold sharp creases at corners and baseboards. Linen blends offer that organic, textural European look but can fray aggressively at cut edges. I counteract this by applying a thin line of Fray Check along all my cuts before soaking the fabric in starch. It’s an extra 20 minutes of prep that saves hours of frustration when you’re trying to tuck a fraying edge into a ceiling corner.
For those who want the absolute easiest entry point into diy wall paper using textiles, consider fabric wallpaper peel and stick conversion. You take a fabric you love, apply a peel-and-stick adhesive backing to it using a product like Thermoweb’s HeatnBond iron-on adhesive, and then you effectively create your own removable wallpaper panels. This avoids wet starch entirely and works brilliantly for covering a wall with fabric in high-moisture zones where starch might soften, like a powder room backsplash or above a kitchen sink. The tradeoff is cost and time. Applying the adhesive backing to four yards of 54-inch-wide fabric takes patience and a lot of ironing.
The Geometry of the Room: Planning Your Layout
Before you cut a single thread, measure your wall and do the seam math. Unlike traditional 27-inch wallpaper rolls, fabric as wallpaper usually comes in 54-inch widths. This is a massive advantage. A standard bedroom wall might need only two vertical drops of fabric instead of six or seven narrow strips of paper. Fewer seams mean fewer alignment headaches and a cleaner final look.
When I map out a diy fabric wall, I always start by finding the most visible corner. That’s where the first full-width panel lands. I work left to right, overlapping each subsequent panel by about one inch. Pattern matching across that inch takes practice. For large-scale prints, buy an extra yard of material to account for pattern repeats. I once lost six inches of vertical alignment on a geometric trellis pattern because I didn’t check the repeat before cutting. The trellis zigged when it should have zagged, and I had to stare at that mistake for two years.
Consider can you wallpaper a door as well. The answer is yes, absolutely, and it’s one of my favorite quick transformations. A flat-panel interior door, the kind you find in every apartment built after 1980, is the perfect canvas for how to wallpaper with fabric. You apply the starch-soaked fabric to the recessed panel areas first, smoothing it into the corners with a plastic putty knife wrapped in a damp cloth. Then you wrap the fabric around the door edges and staple it on the interior side where the hinges live. No one sees the staples. The door becomes a textural moment instead of a forgotten surface. I’ve done this on closet doors, bathroom doors, and once on a refrigerator front using magnetic strips to hold a fabric wallpaper panel in place.
Tools, Prep, and the Wet Work
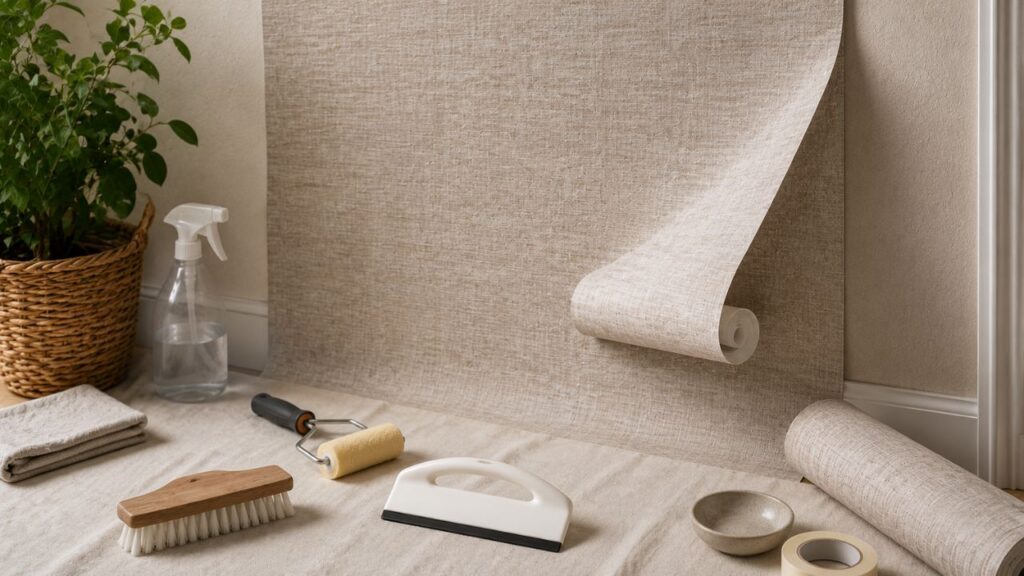
Gather your supplies before you start because once the starch bucket is open, your hands are going to be coated in a slippery cornstarch film. You need a paint roller tray filled with undiluted liquid starch, a 9-inch paint roller with a medium nap cover, a sharp fabric rotary cutter with a fresh blade, a straight edge, a smoothing tool (a plastic wallpaper smoother or a clean silicone spatula), a spray bottle with water, several lint-free rags, and a step ladder.
Prep the wall by wiping it down with a damp cloth to remove dust. Let it dry completely. If the wall has peeling paint or crumbling drywall compound, fix that first. The starch needs a stable surface. I don’t prime before using fabric as wallpaper because starch bonds better to flat latex paint than to primer sealers. The exception is new drywall. Raw joint compound will suck the moisture out of your starch too fast, causing the fabric to dry before you can position it. On new drywall, apply one coat of cheap flat white paint and let it cure for 24 hours.
The actual how to hang fabric on walls process is straightforward but physically awkward. Roll a thick, even coat of starch directly onto the wall section, slightly wider than your fabric panel. Press the dry fabric into the wet starch starting at the top corner. Use your smoothing tool to push outward from the center toward the edges, chasing out air bubbles and wrinkles. Once the panel is flat and positioned, roll another coat of starch directly on top of the fabric. This saturates the fibers from both sides and locks everything tight. The fabric will look terrifyingly wet and dark. Don’t panic. Cotton lightens as it dries. By morning, the color will return to normal and the wall will feel crisp and smooth.
A common fabric wallpaper diy mistake is trimming too soon. Wet fabric stretches. If you run a razor blade along the baseboard while the material is still damp, you’ll cut a straight line that shrinks into a wavy, gapped mess once dry. Wait at least six hours. Overnight is better. Once the fabric is completely dry and rigid, trim the excess with a sharp utility knife guided by a metal straight edge pressed firmly into the corner. The cut will be crisp and exact.
The Peel-and-Stick Alternative for Commitment Issues
I mentioned fabric wallpaper peel and stick conversion earlier, and it deserves its own section because the use case is different. This method appeals to people who want the texture of wallpaper fabric but need to install it in a space where liquid starch isn’t practical. Think bathroom vanities, kitchen backsplashes, or the interior of built-in bookshelves.
The process involves ironing a heat-activated adhesive sheet onto the back of your chosen fabric, peeling off the paper liner, and then sticking the fabric directly to the wall like a giant sticker. The advantage is that you can reposition it multiple times before applying firm pressure. The disadvantage is that the adhesive can fail on textured walls or in extreme heat. I used this method on a small accent strip above a kitchen sink, and it held for three years before a steam-heavy canning marathon finally loosened a corner. For covering walls with fabric in low-moisture, low-touch areas, it’s a clean, dry alternative that requires zero cleanup.
If you’re considering this route, test your fabric first. Thin cotton voile will let the adhesive bleed through and yellow over time. You want a tight weave with some body. The home decor fabrics I mentioned earlier are ideal. And always, always buy an extra half-yard to practice on a piece of foam board before committing to the actual wall. Learning how the adhesive grabs and how to smooth out bubbles on a scrap panel prevents heartbreak on the real thing.
Fabric vs. Traditional Wallpaper: A Practical Breakdown
| Feature | Fabric Wallpaper (Starch Method) | Traditional Paste Wallpaper | Peel-and-Stick Vinyl Wallpaper |
|---|---|---|---|
| Removal | Peels off dry, water cleanup | Requires steaming/scraping | Peels off, may leave residue |
| Seam Visibility | Low (wide panels) | High (narrow strips) | Medium |
| Texture Variety | Unlimited (woven, embroidered) | Limited (printed patterns) | Minimal (flat vinyl) |
| Moisture Tolerance | Low | Medium (with vinyl) | High |
| Repairability | Easy to patch | Difficult | Difficult |
| Rental-Friendly | Excellent | Poor | Fair |
Real-World Scenario: The Rental Kitchen That Couldn’t Be Painted
A friend of mine lives in a 1920s Chicago apartment with a kitchen that hasn’t been updated since the Carter administration. The walls are painted a glossy mustard yellow that no amount of scrubbing can brighten. She couldn’t paint. She couldn’t install tile. We decided to try fabric as wallpaper on the largest wall, the one behind her tiny dining table.
We chose a heavyweight navy and cream Indian block print from a vendor on Etsy. The pattern was busy enough to hide the inevitable kitchen splatters, and the navy grounded the room visually. We used the liquid starch method. Total installation took four hours, including moving the table and trimming around two electrical outlets. Six months later, a spaghetti sauce incident left an orange splatter pattern across three square feet of the fabric. We cut out the stained section using a sharp blade guided by a ruler, starched a patch from the leftover fabric, and blended the seams. The repair took 20 minutes. A traditional sheet wallpaper repair in the same spot would have been visible from across the room. This patch job disappeared into the busy print.
Working With Patterns, Outlets, and Obstacles
Electrical outlets are the nemesis of every diy wall paper project, but fabric wallpaper handles them more gracefully than paper. Turn off the breaker. Remove the outlet cover. Apply your starch-soaked fabric right over the outlet hole, smoothing it flat. Use your fingertip to locate the rectangular opening beneath the fabric. With a fresh razor blade, cut an X from corner to corner inside the outlet box. Don’t cut a rectangle along the edges; leaving the fabric slightly long lets you tuck the raw edges behind the outlet cover plate for a clean finish. If you’re worried about fraying inside the box, dab a little Fray Check on the cut edges before reinstalling the cover.
For light switches that see daily contact, I recommend creating a switch plate cover in the same wallpaper fabric rather than leaving the switch itself exposed through a fabric cutout. Wrap a plain plastic switch plate in the fabric, securing it on the back with hot glue, and screw it into place. The plate becomes a seamless part of the fabric wallpaper design and handles fingertip oils far better than raw fabric edges.
Baseboards and crown molding present the final frontier. The trick to a crisp line at the bottom is to let the fabric overhang the baseboard by a full inch during installation. Once dry, use a wide metal putty knife as a guard. Press the knife into the corner where the wall meets the baseboard, and run your utility knife along the metal edge. The knife protects the baseboard from blade marks and gives you a surgical cut line. This is the detail that separates a diy fabric wall that looks like a professional installation from one that looks like a dorm room craft project.
FAQ Section
How long does fabric wallpaper last with the starch method?
I’ve had installations stay pristine for five years and counting. The fabric wallpaper remains crisp as long as it’s not exposed to direct moisture. In dry, climate-controlled interiors, the starch bond stays stable almost indefinitely. If a corner lifts, you reactivate the starch with a damp cloth, press it back, and it re-bonds.
Can I use fabric as wallpaper in a bathroom?
With caution. I don’t recommend using fabric as wallpaper in a full bath with a shower unless ventilation is excellent. The steam can soften liquid starch over time. For powder rooms or half-baths without a shower, the starch method works fine. For high-moisture bathrooms, consider the fabric wallpaper peel and stick conversion with a moisture-resistant adhesive backing instead.
What happens when I remove starch-applied fabric from the wall?
Removal is shockingly easy. Start at a corner and pull gently. Most fabric wallpaper panels peel away in one piece. Whatever small fibers remain wipe clean with a wet sponge. Once dry, the wall looks exactly as it did before installation. No sanding, no patching, no crying into a bucket of chemical remover.
Can I wallpaper a door that gets heavy use?
Yes, and can you wallpaper a door is one of my most-asked questions. Use the starch method on interior doors that don’t face weather. For exterior doors or high-traffic entry doors, staples along the hinge edge provide extra security. The fabric can be removed later without damaging the door surface.
How do I clean fabric wallpaper once it’s on the wall?
Most fabric for wallpaper projects use cotton or linen blends, which can be gently spot-cleaned with a damp microfiber cloth and mild soap. Test in an inconspicuous spot first. Avoid scrubbing, which can disturb the starch bond and fuzz the fabric surface. For heavily patterned walls, the pattern itself does a lot of the work hiding minor marks.